Lies all lies
June 27, 2009
Sometimes packages lie. Sometimes they will tell you that your creamy and delicious grits are only 25 to 30 minutes away, but it is just lies. An hour later you will still be stirring and babysitting those grits. You will still be tasting them every 5 minutes to see if they have lost their “slightly crunchy should not fill your mouth as much” texture.
But eventually, the grits will soften and be able to provide the perfect bed for this spicy and rich shrimp sauce. Once you taste this dish, you will forget about the horrible lies the package told you, about the chained to the stove feeling you had, and about the “always in trouble still in time out” cat that stole a shrimp from your plate when you went to get your camera. Well, maybe you will not forget about the cat but the shrimp and grits will help soothe your frustrated soul.
Mike Lata’s Shrimp and Grits
From a Yankee in a Southern Kitchen
The meal was fabulous. Great comfort food; the creamy and buttery flavor of the grits was a perfect compliment to the spicy sauce of the shrimp. Make sure to taste the sauce and the grits as you cook and season accordingly. It makes a difference in this meal.
GRITS:
2 cups milk (I needed 2 to 3 extra cups of milk during the cooking process)
1 cup fresh white grits
2 tablespoons unsalted butter
Salt and freshly ground black pepper
SHRIMP:
2 tablespoons unsalted butter
3 tablespoons finely diced onion
3 tablespoons finely diced red bell pepper
2 ounces diced country ham
½ cup shrimp stock or milk (I did ½ chicken broth and 1/8 milk)
3/4 cup heavy cream
1 pound medium shrimp, peeled and deveined
1 tablespoon snipped fresh chives
6 dashes of hot sauce (I added two more or so)
Salt and freshly ground pepper
Couple shakes of Old Bay Seasoning (I feel it is required with shrimp)
For the grits: Bring the milk just up to a tiny boil around the edge of a heavy-bottom saucepan over medium heat. Add the grits and stir for 1 minute. Turn the heat to low. If there are any hulls, skim and remove them now using a slotted spoon. Add the butter, and stir frequently for the first 10 minutes, then stir every 10 minutes to grits are done, about 1 to 1 ½ hrs. Add more liquid if the grits are absorbing the milk. Cover between stirrings. When cream, add salt and pepper to taste.
For the shrimp: Melt the butter in a large, heavy bottom fry pan or enamel skillet. Add the onion and red pepper, cooking till translucent, about 5 minutes. Add the ham and sauté briefly. Stir in the milk or stock, scraping the sides and bottom of the skillet to deglaze the pan. Bring to a boil, and cook till the liquid is reduced by half. Add the cream, bring to a boil, and reduce the liquid making a loose sauce. Add the shrimp, stir, and cook till the shrimp turn pink. Add the chives and season to taste with salt, pepper and old bay.
Divide the grits among four plates, top with the shrimp and some of the sauce. Serve immediately. If you are cooking for less than two, this dish reheats well the next day, just use separate dishes to reheat separately.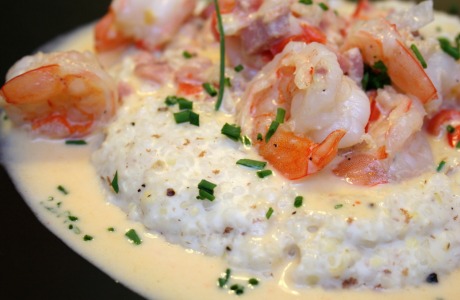
The greatest thing of all
June 18, 2009
If I had to pick my favorite food in the world, it would be sandwiches. No, I am not getting more descriptive than that. I am picking a category as my favorite food and there is not much you can do about it. I love the sandwich; it is the perfect vessel for almost anything. Its bulky carb-loaded exterior only makes me love it more.
Sandwiches are the chameleons of the food world. They can adapt to your mood and palate and satisfy what whatever culinary need you have at the time. Almost anything I can think of can go on a sandwich or goes with a sandwich and many foods already come in sandwich format: the breakfast sandwich, ice sandwiches. When you think about it, a layer cake is pretty much a big delicious sandwich. Two halves of moist cake like bread sandwiching a sweet usually fruit laden filling.
Sandwiches options are endless. When you combine the number of types of available supporting exteriors with the number of types of available filling interiors, the exponential possibilities could fill a million Olympic sized swimming pools. (Disclaimer: I am not a mathematician. This illustration is merely conjecture on my part and nothing more unless you have access to a million Olympic sized swimming pools; then we shall talk).
For example, take a grilled cheese sandwich. With the amount of cheeses and type of bread out there, you could live on different types of grilled cheese sandwiches for at least a year, I would think. And if you add tomatoes or basil or bacon or tomato sauce or apples or whatever to the mix you could add another 6 months. You could sustain yourself on different types of grilled cheese alone for many years; infact many children and college students do. And while this might not be a viable option for you, you have to appreciate the fact that it exists.
Yes, the world is full of sandwiches and what a wonderful world it is.
Salmon Sandwiches
Adapted from Yum
These salmon sandwiches are awesome. The flavors of the marinade really work well with the fish and come across in the sandwich. It is a perfect summer dish that doesn’t take much time. We marinated the salmon for about 5 hours. We also used a regular French bread loaf. I would probably use Ciabatta as the original recipe suggests because the French bread was too chewy for the salmon and some of the taste was lost. We also left the capers off. Overall the meal was great and I cannot wait to make it again. The salmon would also work sans bread but why wouldn’t you want to have a sandwich if you could.
1-1.5 lb. fresh salmon
Marinade:
1/2 c. olive oil
1/4 c. fresh lemon juice
1/2 c. soy sauce
3 T. balsamic vinegar
1 T. mustard
1 t. salt
1 t. pepper
2 T. Worchestershire
12 or so garlic cloves, crushed
Garlic Lemon Mayo:
1/3 c. mayo
Juice of 1/2 lemon
1-3 garlic cloves (I use 3) pressed in garlic press
Ciabatta bread
Romaine
Sliced tomato
capers and lemon wedges to garnish
Whisk marinade ingredients together and place in zip-lock bag. Add salmon and refrigerate to marinate. 30 minutes to 24 hours. Turn oven to broil and broil salmon until dark on top and meat is done to your preference about 10-15 minutes depending on thickness of fish.
While salmon is broiling, combine mayo, garlic and lemon juice. Mix well. Toast ciabatta pieces and spread with mayo mixture. Top with romaine, tomato, salmon and capers. Squeeze fresh lemon juice on right before serving.
And it takes a Swan Dive
May 20, 2009
Every two weeks, I sit down with a blank piece of paper, grocery store ads, my 3 ring binder of recipes (mostly printed from other lovely blogs), a list of the proteins in my freezer, and a promise not to curse to much during the menu planning process. An hour later, I have a menu filled with fourteen different entrees (most of which are commonplace in the weekly rotation), a shopping list complete with hieroglyphics reminding me of whichever store has the best price, and a headache from cursing too much. Immediately after finishing this tortuous task, we head to the grocery store so I can unleash my menu planning frustration on the world.
Why do I do this? Because in reality, it saves time and creates a harmonious and unstressful environment for dinner assembly. It’s a see the forest through the trees kind of thing. However, my desire to end the menu planning torture usually results in what I call Swan Dives Meals. These are meals that make it onto the menu because I am running out of time and I have a recipe that matches some random protein in the freezer. So I become a carefree non-anal person that I am not and put it on the menu.
Then, the day to actually make the recipe comes and somehow the recipe miraculously swan dives off the menu and I make something else with the ingredients I have on hand.
If the story stopped there, you would perceive me to be a normal well adjusted semi-neurotic individual but it does not. I feel guilt. Often times, I am so guilty that the recipe did not have its chance in the sun, its opportunity to make my taste buds dance, or its chance to make it on Alex’s vegetables I will eat list, I will put it on the menu again.
I am not going to tell you how many times recipes swan dive off the menu only to crawl their way back just to face elimination again. Just know that I cannot tell you what Kung Pao chicken tastes like but according to my menu plans I must love it because we have had it 20 times this year.
Asian Ground Beef Lettuce Wraps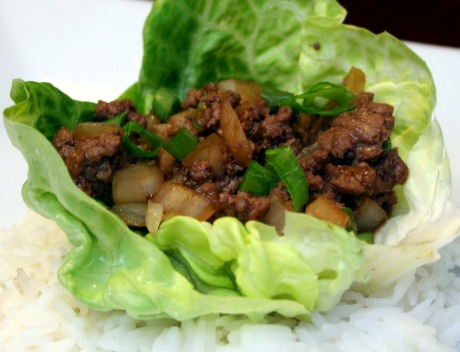
Recipes comes from Dine and Dish who found the recipe on Allrecipes
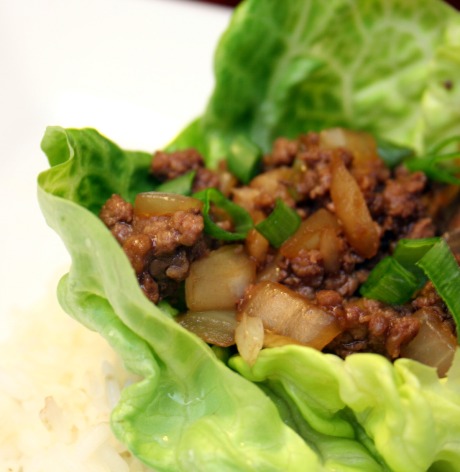
These lettuce wraps were one of those swan dive meals and even yesterday, I almost swapped it with baked ziti at the eleventh hour. I am so glad I pressed on and saw this recipe into fusion however. The Asian flavors were spot on. The ginger gave it the need kick and the filling was a great inside its lettuce container.
Alex, who has lettuce on the inedible list, ate his filling with jasmine rice and enjoyed his meal as much as I did.
Asian Ground Beef Lettuce Wraps, from Allrecipes
- 16 Boston Bibb or butter lettuce leaves
- 1 pound lean ground beef
- 1 tablespoon cooking oil
- 1 large onion, chopped
- 2 cloves fresh garlic, minced
- 1 tablespoon soy sauce
- 1/4 cup hoisin sauce
- 2 teaspoons minced pickled ginger
- 1 tablespoon rice wine vinegar
- Asian chile pepper sauce (optional)
- 1 (8 ounce) can water chestnuts, drained and finely chopped
- 1 bunch green onions,
 chopped
 - 2 teaspoons Asian (dark) sesame oil
- Rinse whole lettuce leaves and pat dry, being careful not tear them. Set aside.
- In a medium skillet over high heat, brown the ground beef in 1 tablespoon of oil, stirring often and reducing the heat to medium, if necessary. Drain, and set aside to cool. Cook the onion in the same pan, stirring frequently. Add the garlic, soy sauce, hoisin sauce, ginger, vinegar, and chile pepper sauce to the onions, and stir. Stir in chopped water chestnuts, green onions, and sesame oil, and continue cooking until the onions just begin to wilt, about 2 minutes.
- Arrange lettuce leaves around the outer edge of a large serving platter, and pile meat mixture in the center. To serve, allow each person to spoon a portion of the meat into a lettuce leaf. Wrap the lettuce around the meat like a burrito, and enjoy!
Notes: I did not use the chile sauce; although Alex thought they could have used a little more kick so I definitely will next time. I also cooked the meat first and added the onions and water chestnuts to the meat mixture. After 3 to 4 minutes, I made a well in the meat mixture and added the liquids and the green onions then stirred everything together. My goal here was to keep as many plates as clean as possible. 🙂
It was a mother of a meal
May 10, 2009
When I was little, I had a restaurant. It was only open on Sundays and only opened for my mother. It had a fancy name, Chez a la Me and fancy décor. My sister and I hung a Strawberry Shortcake sheet set from the ceiling. When you were in front of the sheet set, you were in the front of the house and were whether a waiter or a hostess. It was easy to tell the difference between the two because not only did we have name tags bearing a man’s name (which was weird I know) but when you were the waiter, you were forced to don a construction paper mustache.
The back of the house contained the crazy chef, which was always me. I would often shout during the cooking process at my imaginary kitchen staff. I was heavily into Yan Can Cook and though screaming was part of the culinary process. We had a full menu, written in crayon, complete with all the fancy names of dishes I heard Julie Childs say; however, we were often out of everything except scrambled eggs. Often times they came with cheese and sometimes they remained un-scrambled and came in a buttery toast frame instead. That was our most famous dish.
We were very popular. Every table in our restaurant was taken, the minute we got my mom out of bed and sat her in it. Chez a la Me was open for many years. Eventually the décor changed, the mustaches were left behind, and the food got much better, but through the years, our mother and only customer (of course non-paying) remain constant. So thanks mom for sitting at our table and just as I promised at 8, I will never tack a sheet into the ceiling again unless we are building a fort.
Mother’s Day Brunch
This year for Mother’s Day, I opened the restaurant one more time and cooked for two important people in my life. And unlike the early years of Chez a la Me, the food was not only edible it was great. The recipes we served are listed below.
Fruit Bruschetta
From the fabulous blog The Way The Cookie Crumbles; Her blog is an inspiration and her comparison posts are the greatest. You must check it out.
Makes 16 bruschetta
16 ½-inch-thick slices crusty Italian or French bread
2 tablespoons melted unsalted butter
1½ tablespoons sugar
1½ tablespoons cinnamon, or to taste
4 Kiwis
2 banana, cut into fine dice
10 large strawberries, cut into fine dice
2 tablespoons of orange juice
3 to 4 tablespoons vanilla yogurt
honey for drizzling
Preheat oven to 375°F.
Arrange bread slices in one layer in a shallow baking pan and bake in middle of oven until golden, about 10 minutes. Brush toasts with butter on one side. Toasts may be made 1 week ahead and kept in an airtight container.
In a small bowl stir together 1 tablespoon sugar and cinnamon and sprinkle evenly over buttered side of each toast. Broil toast about 5 inches from heat under preheated broiler 30 seconds, or until tops are bubbling, and cool.
In a bowl stir together fruit, the orange juice and remaining ½ tablespoon sugar and mound about 1 tablespoon on each toast. Top each toast with about 1 teaspoon yogurt and drizzle with honey.
I did not eat these because of my texture issues with bananas but everyone who did really enjoyed them. The thought the flavors complimented each other very well and it was a semi-healthy way to start the meal.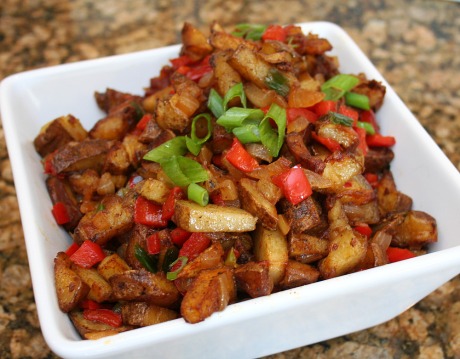
This recipe comes from my boyfriend Tyler Florence. It was part of a whole recipe for salmon hash with a poached eggs and hollandaise sauce. The potato hash was perfect. The potatoes were crisp and the onion and the red pepper gave them dish some complexity. I made have also added some crumbled bacon to the mix.
About 1 cup extra-virgin olive oil
4 russet potatoes, rinsed in water and cut into large dice
Kosher salt and freshly ground black pepper
2 onions, thinly sliced
1 red bell pepper, seeds and ribs removed, thinly sliced
2 cloves garlic, minced
2 green onions, finely chopped
3 sprigs fresh thyme, leaves removed
1 teaspoon smoked paprika
Pinch cayenne pepper
Heat a large saute pan over medium-high heat and add olive oil. Once heated add the potatoes and shallow-fry for about 8 minutes until evenly browned on all sides. Remove the potatoes with a slotted spoon and place onto a paper towel-lined plate. Season with salt and pepper and transfer to a large bowl.
Remove most of the oil, leaving only a couple of tablespoons. Place over medium heat and add the sliced onions, sliced peppers and garlic and allow to caramelize. Add the green onions, thyme leaves, paprika and cayenne pepper. Season with salt and freshly ground black pepper, to taste, and stir to combine. Add the potatoes back to the pan and stir to combine.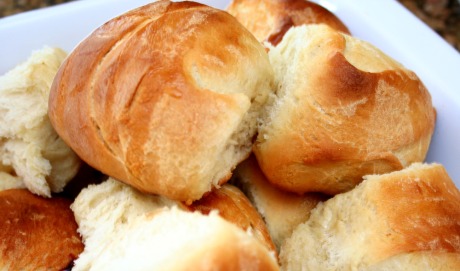
Honey Yeast Rolls
Come from Annie’s Eats. I cannot say enough about her blog. There are some many great recipes; hers is often one of my go-tos. These rolls were airy and delicious. The honey made them just sweet enough. I make them all the time and they are always a huge hit.
Honey Yeast Rolls
Ingredients:
2 ¼ tsp. instant yeast
1 cup warm water (105°-115° F)
¼ cup honey
3 tbsp. canola oil
1 ¼ tsp. salt
1 egg, lightly beaten
4 cups bread flour
vegetable cooking spray
1 tbsp. butter, melted
1 tbsp honey
Directions:
In the bowl of an electric mixer fitted with the paddle attachment, combine the yeast and warm water. Add the honey, oil, salt, and egg and mix well. Add 3 cups of the flour and mix until the dough comes together in a sticky mass. With the mixer on low speed, add the remaining 1 cup flour and mix until it is incorporated into the dough. Switch to the dough hook, and continue kneading on low speed until the dough is smooth and elastic, about 8 minutes.
Form the dough into a ball and transfer to a lightly oiled bowl, turning once to coat. Cover the bowl with a damp kitchen towel and let the dough rise in a warm, draft-free spot until it doubles in bulk, about 2 hours.
Turn the dough out onto a lightly floured surface and knead for 30 seconds. Cover and let rest for 10 minutes.
Punch the dough down and divide into 12 equal portions. Shape each portion into a ball and place into a round, lightly greased baking dish, spacing evenly. Cover and let rise in a warm, draft-free place for 20 minutes. Mix together the melted butter and honey, and brush lightly over the tops of the rolls. Bake at 400° for 13-15 minutes or until lightly browned. Serve warm or at room temperature.
Frittatas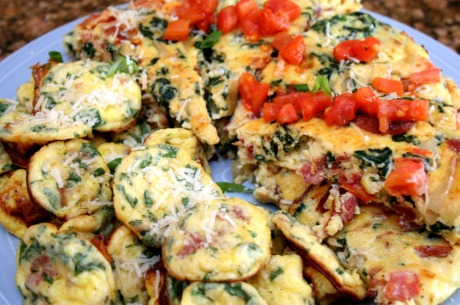
The last piece to this Mother’s Day puzzle were two types of Frittatas. I double them the Boy and Girl Frittatas.
This was Giada recipe and was very good. Although, I thought some of the flavors, the ham and cheese, got lost in the eggs. I even cooked the ham beforehand and there was still nothing more than an undertone. Everyone loved them but I thought they could use a little tweaking.
Ingredients
Nonstick vegetable oil cooking spray
8 large eggs
1/2 cup whole milk
1/2 teaspoon freshly ground black pepper
1/4 teaspoon salt
4 ounces thinly sliced ham, chopped
1/3 cup freshly grated Parmesan
2 tablespoons chopped fresh Italian parsley leaves
Preheat the oven to 375 degrees F.
Spray 2 mini muffin tins (each with 24 cups) with nonstick spray. Whisk the eggs, milk, pepper, and salt in a large bowl to blend well. Stir in the ham, cheese, and parsley. Fill prepared muffin cups almost to the top with the egg mixture. Bake until the egg mixture puffs and is just set in the center, about 8 to 10 minutes. Using a rubber spatula, loosen the frittatas from the muffin cups and slide the frittatas onto a platter. Serve immediately.
The Girl Frittata
This came from my own mind and was very good. I thought the flavors of each element really shone through and created a great dish.
7 cups of fresh spinach
1 medium onion thinly sliced
6 slices of bacon
½ medium tomato
10 eggs
½ cup of whole milk
Salt
Pepper
¾ cup of Gruyere cheese
Butter
Note: Seasoning each element is important so remember to add salt and pepper to the onions and the spinach during the first phase of their cooking.
1. Preheat oven to 400.
2. Add a half of tablespoon of butter to a 10 inch non stick skillet over medium high heat.
3. Add the onions to the pan and sauté until soften and caramelized about 6 minutes. Remove onions from the pan and keep warm.
4. Cook the bacon in the same skillet you cooked the onions in until crispy. Remove the bacon from the pan.
5. Discard some of the bacon drippings but leave 1-2 tbsp in the pan. Add the spinach and sauté.
6. Cook the spinach until wilted about 6 minutes. Remove of pan and drain the spinach. Push on the spinach until most of the water is gone.
7. In a separate bowl, mix your eggs, milk, cheese, salt and pepper. Whisk until scrambled.
8. In the same skillet you cooked the onions, bacon, and spinach in, add the tomatoes to the pan. Cook about 2 minutes. Discard any tomato water that comes out of the tomato.
9. Add the onions, spinach, and tomatoes to the pan. Cook for 3 minutes until everything is warmed.
10. Crumble the bacon into the pan.
11. Add the eggs over the onion and spinach mixture.
12. Cook on the stove for 3 minutes, moving the eggs around slightly with your spoon. This is the time you want to make sure the onion, spinach and tomatoes are properly distributed.
13. Place the skillet in the oven and cook for 8-10 minutes.
14. If the top of your frittata is still loose (excess egg on top) you can put it under the broiler for 1-3 minutes.
15. Remove the pan from the oven and remove the frittata from the pan onto a cutting board. The frittata should come out whole.
16. Cut the frittata like a pizza into 8 slices and serve.
A Barbecue Blanket
May 7, 2009
My husband shares a disease with a large population of the United States. It is an ailment that I am not fond of and become very frustrated with from time to time. Alex has an aversion to all condiments with the exception of barbecue sauce. He wants nothing to do with mayonnaise, ketchup, mustard, or salad dressings. No matter what I add to it or what fancy aioli name I call it, he knows and is unwilling to venture into the strange substance zone.
He will and does put barbecue sauce on almost anything. Carefully crafted flavor profiles get destroyed by that sweet tangy blanket of sauce. I die a little inside every time he does it. This week I made Thai Peanut Chicken Burgers with a Cilantro Lime Aioli. The burgers were perfect; there was a subtle peanut undertone that was a great foundation for the Thai flavor to build on. The meal was complete with oven baked fries and even though the meal was overall healthy, the flavors were causing culinary cherubs to dance on my tongue.
What was Alex doing while I was enjoying this symphony of flavors, pouring barbecue sauce all over every inch of it. I do not think he even tried some without the smoky smothering. His critique: “This is really good. You cannot taste much of the peanut butter though.” I am sure that most of you are rolling your eyes with me now, but that barbecue sauce protects another secret: the burgers were made with carrots, Alex’s arch-nemesis of the vegetable world. So go ahead honey, pour that barbecue sauce on anything you like; those carrots sure taste good now, don’t they?
Peanut Chicken Burger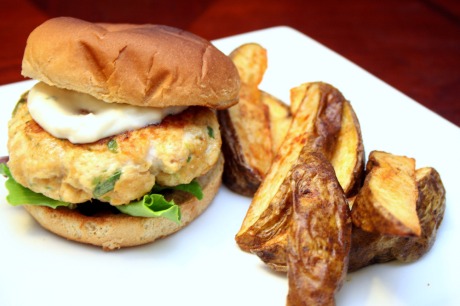
Adapted from A Good Appetite and Cara’s Cravings (one of my favorite healthy blogs)
1 medium carrot, julienned
1 scallion, chopped
¼ tsp ground ginger
1 tsp kosher salt
2 breast of chicken
2 Tbsp chunky peanut butter
1/2 tsp sesame oil
1 tsp sriracha chili sauce
Place the two chicken breasts in the food processor. Pulse the meat until most of the bigger chunks are gone and you have a smooth chicken paste with some bigger pieces of chicken in it.
Place all the ingredients together in a bowl. Work with hands to mix but to do overwork.
Cook on a griddle (turkey burgers tend not to hold together well on a grill) until done, about 6 to 7 minutes per side.
Serve with lettuce leaves, more julienned carrots & Cilantro Lime Aioli.
Recipe Notes:
– I added the peanut butter, sesame oil, sriracha chili sauce, and ground ginger to food processor after I had pulsed the chicken a few times. This helps to blend the flavors.
-I finished the burgers in the oven after they got golden brown on each side. It took about 10 mins in a 350 degree oven.
Nutritional Info- taken from Spark Recipes (not including the bun or the aioli)
Servings per recipe: 4
Calories: 218.4 Total Fat: 8.5 Cholesterol 71.6 Total Carbs: 4.9 Protein: 29.9
Cilantro Lime Aioli
1 ½ tbsp light mayo
½ tbsp of lime juice
1 tbsp fresh cilantro; minced
1 clove of garlic minced
Dash of salt and pepper
Mix well and top burgers.
Oven Baked Fries 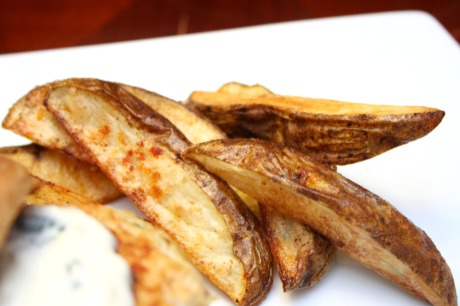
This fries are amazing and they are baked so they are healthier than the alternative.
Ingredients
2 tablespoons canola oil
3 large baking potatoes, 12 ounces each
1/2 teaspoon salt
1 tablespoon finely chopped fresh parsley leaves –I omit
Other seasonings to your taste such as paprika, chili powder, Cajun seasoning, or cayenne powder
Directions
Preheat the oven to 450 degrees F.
Cut the potatoes into 1/4-inch sticks. In a large bowl, toss the oil, potatoes and 1/2 teaspoon of salt. Spray a baking sheet with cooking spray and spread the potatoes onto it in a single layer. Sprinkle with seasoning to your taste such as paprika, chili powder, Cajun seasoning, or cayenne powder. Bake until golden and crisp, about 35 minutes.
Remove potatoes from the tray with a metal spatula. Toss with parsley and additional salt, to taste. Serve immediately.
Nutritional Info- taken from Spark Recipes
Servings per recipe: 4
Calories: 283.5 Total Fat: 7.4 Cholesterol 0.0 Total Carbs: 50.0 Protein: 5.9
My Buttery Complexion
May 5, 2009
You will never hear the words, “When I cook I am…. clean, meticulous, wary, careful or non-destructive” come out of my mouth. This is because I am none of those things. I am destructive and messy. I have covered myself in flour, dropped red food coloring gel into the carpet, and lost a tray of deviled eggs because of my two left feet. When I am done creating in the kitchen, Alex will jokingly take a match in the danger zone under the ruse that he is going to burn it instead of clean it.
So last week, when I got my first real cake order, I prepared myself for more of the same. But it never came. Sure, my first Betty Boop lost her arm and the first cartoon bubble was missing a word but those were minor mistakes and easily fixable. The fact that the recipe was missing instructions on when to add the sugar and the first layer almost went without, it was no match for my cunning skills. One lick of the spoon and I knew what happened.
I was on the home stretch with an almost flawless victory under my belt, and then it happened. My face was a little funky from the hours of work in the kitchen; there was a little of this and a smidgen of that splattered across my cheeks. I searched the kitchen for something to help with my problem and I picked up a damp paper towel from the growing pile of discarded ones on the counter. I wiped my face vigorously, excited about clean complexion that was coming. Around the thirty second mark, I realized my mistake. I had picked up the paper towel I used to grease my cake pans and had just greased my face with the buttery remains.
Gross. I felt gross. After 3 face washings, still gross. Telling this story now, gross. So maybe from now on, I will start paying attention. Or maybe not because, quite honestly without these stories to tell, life might become a little less gross, but it would definitely be a lot more boring.
German Chocolate Cake: Inside Out
Inspiration and Recipe come from Sass and Veracity
For the cake…
2 c. sugar
1-3/4 c. all purpose flour
3/4 c. natural unsweetened cocoa
1-1/2 tsp. baking powder
1-1/2 tsp. baking soda
1 tsp. kosher salt
2 lg. eggs
1 c. whole milk
1/2 c. vegetable oil
2 tsp. vanilla
1 c. boiling water
For the filling…
7 oz. sweetened shredded coconut (about 2 c.)
4 oz. chopped almonds (about 1 c.)
14-oz. can sweetened condensed milk
1 T vanilla
1/4-1/2 c. heavy cream
For the topping…
2-1/2 sticks unsalted butter (1-1/4 c.)
10 oz. semisweet chocolate
3 T light corn syrup
Preheat oven to 325 degrees F. Spread the coconut on one baking sheet, and the chopped nuts on another. Bake for about 15 minutes or until coconut is just beginning to brown and nuts are aromatic. Remove from oven, and stir, then set aside.
Turn the oven temperature up to 350 degrees F and prepare two 8″ x 3″ cake pans by lightly oiling, lining the bottoms with parchment, oiling again, then lightly dusting with flour. Set them on a large cookie sheet if you can. Heat some water to the boiling point — you’ll need to add it to the batter.
In a large bowl, mix the flour, cocoa, sugar, baking soda and powder, and salt. Whisk a few times to blend well. Add the eggs, milk, oil, and vanilla to the dry ingredients, and beat at medium speed for 2-3 minutes. Pour the boiling water into the mixture and mix well.
Pour batter into the prepared cake pans and place them in the oven to bake for 40-45 minutes or until a wooden skewer inserted into the center is clean after removed.
Cool the layers in the pans on a rack for 15 minutes, then remove them and cool on the racks completely. When the layers are completely cool, cut each in half horizontally to create four layers. Remove all parchment.
To prepare the filling, after removing the cake layers from the oven, turn the temperature up to 425 degrees F. Pour the sweetened condensed milk into a casserole dish that will fit inside a larger pan. Pour hot water into the larger pan to reach half way up the sides of the casserole. Cover the entire set up with foil and seal well. Bake for 45 minutes. At that point, remove the foil with extreme caution as steam will be released, and check the water level. Add more hot water to reach half way up the sides of the casserole again, seal well with foil and place back in the oven for an additional 45 minutes. The milk should be thick and the color of a rich caramel. Stir, and keep warm and covered.
To prepare the topping, melt the butter in a sauce pan. Remove it from the heat and add the chocolate in small pieces, stirring until the chocolate is melted. Stir in the corn syrup. Reserve 1 cup in a bowl and place it in the fridge to thicken, about 1 hour. Stir well occasionally until it reaches a spreadable point. Keep the remainder of the chocolate mixture at room temperature.
To assemble the cake, mix the dulce de leche, most of the coconut (save some for decoration if you wish), nuts and vanilla and stir well. The mixture must be spreadable. Pour in just enough heavy cream to achieve the desired consistency and mix well.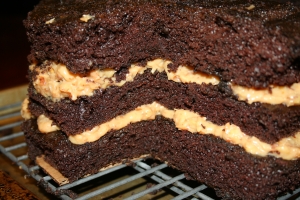
Place the first cake layer on a piece of cardboard cut for the cake, or the removable metal bottom of a cake pan and place it over a baking rack set above a baking sheet to collect excess glaze when the topping goes on. Divide the filling into three equal quantities. Mound 1/3 of the filling onto the first layer and spread with an offset spatula that has been dipped in water. Continue until all layers are assembled.
Cover the sides and top of the cake with the chilled chocolate. If it’s too firm, put it in the microwave for 5 seconds and stir until it softens, but do not over use the microwave or you’ll ruin the chocolate. Make sure the warm chocolate is pourable, reheating over an extremely low flame briefly, and then stirring until glossy and smooth. Pour over the center of the cake, and with an offset spatula, gently push it to the sides and over, smoothing as you go as little as possible. Warm water to dip the spatula in works wonders for this. Allow to sit until the chocolate is finished dripping, and remove to a cake platter then refrigerate until serving. To slice, warm a knife in hot water.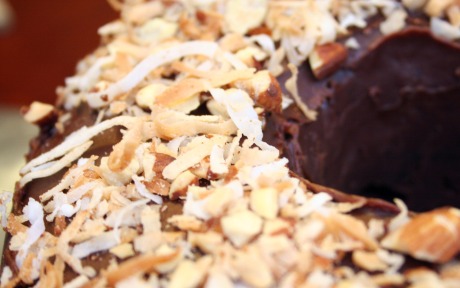
Tips:
– I did not need all the coconut and almonds to make a filling for the cake. I used the remainder as topping.
– The cake is very moist and was probably not the best for sculpting but it was very very very good.
– The dulche de leche took longer then an hour and a half. I tripled the filling and it took about two hours to get to the right color.
– I never added the vanilla to the dulche de leche. I am realizing that now while re-reading the directions but the filling was perfect. It was caramel rich and delicious without it. So it is up to you.
Assessment:
Cindy, Alex and I all tried the components separately. Cindy made a mini cake of the leftover pieces and claimed it ethereal. I thought the cake was exactly as amazing but still very rich. Milk would probably be a requirement.
I have had nothing but glowing reviews from the party the cake was made for. The birthday girl was over the moon and everyone had more than one slice than night.
There are many elements to this cake but it comes together quite nicely. The chocolate ganache frosting was some of the best that has come out of my kitchen.
Betty Boop Instructions
I bought gumpaste from our local Michael’s. The cake was a last minute kind of thing and I didn’t have time to make some.
I colored the gumpaste with Wilton’s color gel. I colored it to match her complexion. Then I rolled the gumpaste thin. I used my pasta roller to get the gumpaste as thin as possible. I took it to the 1 setting on my pasta roller.
I laid the gumpaste over the coloring page I had printed out and painted/traced her. I used the Wilton color gels to make paint. I took a half of teaspoon of the color and a couple drops of vodka and mixed it together. Once I painted the outline, I cut her out with an exacto knife. After she was cut, I painted the rest of her.
She dried within 2-3 hours (because she was so thin). Be very careful. Gumpaste is very fragile. The first Betty can tell you about that; I mean once she gets her arm back.
Desperately Seeking Dessert
April 25, 2009
If you have found yourself wondering what cliff the Cynical Chef drop off of in the past month and a half I apologize. I promise the void that has been my blog has been for a good reason. The time that I had previously been spending cooking, delicious cream filled, cheese laden, cinnamon and sugar dusted recipes is now being spent sweating profusely, begging for mercy, and realizing that no matter how long you walk on the treadmill you are still moving in one place.
That is right; the Cynical Chef has taken her lethargic butt to the gym, complete with a sadistic trainer, this is going to be a long journey but a fulfilling one. What does this matter to you? Well hopefully, you care about my well being and incase, I am being too assuming of your fondness for me, the recipes I will be posting in the future will have a healthy foundation. There will still be treats and cheater meals mixed in, which is why my trainer doesn’t have the web address, but my focus with primarily be on healthy cooking and living.
One thing you can still expect are the trials and tribulations of my kitchen and more importantly, the place I affectionately call Hell but most people call the gym. For example, the recent decision I made to attend a Step Class. Now, I am not sure what circuit shorted in my brain that made me think my clumsy, ungraceful, 6’3″ body could manage this class with ease, but nevertheless I stood in front of my plastic alter praying for mercy. I did not find it.
Twenty minutes into the class, the instructor spoke of a move called “Around the World”; I am not going to bother explaining how to perform this maneuver because no one ever should attempt it. I followed her instructs to the tee, stepped up on my step and somewhere around China, I completely lost my footing. I fell off my step backwards praying that I would be the only causality and fell into the very fit and very tiny woman next to me. She fell and took out the girl behind her and then a couple more fell. What did I do? I promptly removed myself from the carnage, realized that my ankle was bruised and had to wait for my trainer to carry me from the room.
What did I learn from this you ask? That group exercise is not something I should be participating in (the trainer actually suggested this lesson) and skinny ladies go down easier than a string of dominos.
Flank Steak Sandwiches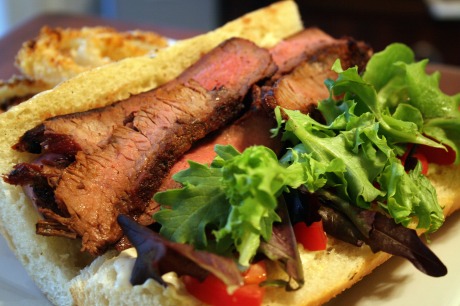
This came from mine and Alex’s head. You can also serve this on a multi-grain roll but today was our cheat meal and a French baguette is what we wanted.
Grilled Flank Steak Ingredients
1 Pound Flank Steak
Salt
Pepper
Garlic Powder
Onion Powder
Paprika
Cumin
Sandwich Ingredients
Lettuce
Tomato
Baguette
Garlic Aioli
Grilled Red Onions
Grilled Red Onion
1. Cut the ends from the onion and peel the outer layer from the onion.
2. Cut the onion into ¼ inch slices.
3. Brush the onions with olive oil. Use less than one teaspoon of olive oil for the whole onion.
4. Place the onion on the grill over medium heat. We use a vegetable metal tray for the grill but you can place directly on the grill or on tinfoil directly on the grill.
5. Cook about 6-8 minutes on each side until caramelized and delicious.
Garlic Aioli
1. Combine tablespoons of low fat mayo, a pressed clove of garlic, a teaspoon of fresh lemon juice, and salt and pepper into a bowl. Spread the aioli on the baguette. You can also use as a dipping sauce for the Onion Rings.
Flank Steak
1. Trim the excessive fat from the flank steak.
2. Pound the flank steak with a meat tenderizer for 15 seconds on each side. Remember to pound the meat evenly. You are doing this since we are not marinating the meat to ensure tenderness.
3. Season the meat with the salt, pepper, garlic powder, onion powder, paprika, and cumin. This is really to taste. If you like more of one spice than the other; feel free to use more.
4. Place the meat on the grill over Medium/High heat. Cook 7-10 minutes on each side or until you reach your desired level of doneness.
5. Let the meat rest for 10 minutes,
6. Cut the meat on a bias in thin slices.
Assemble the sandwich with the grilled red onions, 4 to 5oz of flank steak, garlic aioli, lettuce, and tomato. Enjoy!!!
Alex and I rate these sandwiches a 10. They satisfied our desire for an unhealthy meal in a healthy way and the Oven Baked Onion Rings are a great compliment to the sandwich.
Oven Baked Onion Rings From Life’s Ambrosia
You will need:
- 2 large onions, peeled, sliced into 1/4 inch slices, separated into rings
- 1/2 cup flour
- 1/2 tsp granulated garlic
- 1/2 teaspoon fresh cracked pepper
- 1 teaspoon kosher salt
- 2 eggs
- 1/2 cup milk
- 1 1/2 cup panko bread crumbs
- 3/4 cup shredded Parmesan cheese
- In a large resealable plastic bag, combine flour, granulated garlic, pepper and kosher salt. In bowl beat together eggs and milk. In another bowl, combine panko bread crumbs and shredded Parmesan cheese.
- Place the onion rings into the plastic bag and shake to lightly coat. Dip into egg wash, drain off excess. Dredge in panko and Parmesan cheese mixture to lightly coat. (Note: The onion rings may not be completely coated, that is okay.) Repeat process until all onion rings are coated.
To fry:
- Heat 1/2 inch canola oil in a large sauce pan over medium-high heat. Once the oil is hot, (Note: if you have a thermometer it should be 365 degrees, if you don’t have one, sprinkle a few pieces of the panko and if they sizzle its hot enough), fry the onion rings in batches, until golden brown, about 2 minutes. Be careful not to overcrowd the pan, or they will get soggy. Drain on paper towels. Sprinkle a little more Parmesan over the top if desired. Serve.
To bake:
- Preheat oven to 400 degrees.
- Spray a cookie sheet with non-stick spray. Lay the onion rings in a single layer not touching each other. Drizzle with olive oil.
- Bake 10 minutes. Turn and bake 10 more minutes. Sprinkle with a little more Parmesan, if desired. Serve.
We oven baked these rings and found that additional time was needed. Even after 20 minutes on one side, they were still not golden enough to flip. After a few minutes under the broiler on each side, we were good to go. I rate these onion rings a 7; they were good but not great but it did help satisfy that craving.
Have torch will fire
March 13, 2009
Many of my gender have a fascination with shoes. Take my sister, Cindy, she lusts after them, owns a bazillion of them, and will try on four to five with every outfit. She will scrunch and distort her feet, all for the sake of fashion. She can often be found teetering on 3 inch heels as she looks down on the little people below. At a size 13 shoe, I am very envious of her ability to slip into any sandal, sling, slipper, sneaker, or scuba flipper that comes here way. I imagine if Prince Charming walked into a room, he would have taken one look at the size of our feet and proclaimed my sister Queen, without the formality of a try on.
Alas, my obsession had to be focused on something less size specific. As usual, I found my comfort in the confines of my kitchen. My cabinets, pantries, and drawers try to conceal my secret, but each one of them is bulging at the seams of kitchen gadgets. Pasta rollers, potato ricers, cookie scoops, cake decorating tips, garlic presses, chocolate curlers; they all live in my kitchen. My latest gadget ironically came from my sister. I think it is an effort to keep my fixated to my obsession so I don’t try to shove my size 13s into her beautiful shoes.
My latest gadget is my kitchen torch. The little piece of kitchen real estate is quickly becoming my favorite thing in the world. “Oh, you have a marshmallow that needs browning for your S’More? I can help with that!” “What is that you say, you have no way of browning the meringue on your Baked Alaska? Step aside, I got this!” I wield my torch with the expertise and precision of a culinary superhero able to cause fires at will.
Alex says the power has gone to my head. He claims my ability to produce fire on command has clouded my judgment. He may have reached this conclusion on Valentine’s Day when I lit a napkin on fire and burnt sugar into liquid magma into one of our bowls. However, I respectively disagree. I understand that with great power comes great responsibility; but frankly, I am still in the learning curve so everyone be careful.
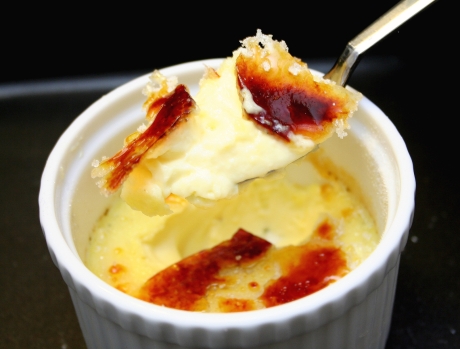
Once again, we are going to call upon my Food Network husband, Tyler Florence for this recipe. This custard is creamy and flavorful. It has the perfect snap of the sugary topping that is required with a Crème Brulee. We went with the traditional vanilla but I am sure his other variations would be delicious as well. We also thirded the recipe and made 3 brulees. Alex and I score the recipe a 9.
Tips:
- If you don’t have superfine sugar, take regular sugar and pulse it in the food processor for 30 seconds.
- It is better to create two layers of sugary containment. Lay down ½ a tablespoon of sugar and fire that then sprinkle the remaining ½ tablespoon over the hardened sugar and fire again. This creates that snap but keeps you from burning the sugar.
Ingredients
- 9 egg yolks
- 3/4 cup superfine white sugar plus 6 tablespoons
- 1 quart heavy cream
- 1 vanilla bean

Directions
Preheat oven to 325 degrees F. In a large bowl, cream together egg yolks and sugar with a whisk until the mixture is pale yellow and thick.
Pour cream into a medium saucepan over low heat. Using a paring knife, split the vanilla bean down the middle, scrape out the seeds and add them to saucepan. Bring cream to a brief simmer, do not boil or it will overflow. Remove from heat and temper the yolks by gradually whisking the hot vanilla cream into yolk and sugar mixture. Do not add hot cream too quickly or the eggs will cook.
Divide custard into 6 (6-ounce) ramekins, about 3/4 full. Place ramekins in a roasting pan and fill pan with enough water to come halfway up the sides of the ramekins. Bake until barely set around the edges, about 40 minutes. You may want to cover loosely with foil to prevent browning. Remove from oven and cool to room temperature. Transfer the ramekins to the refrigerator and chill for 2 ho urs. Sprinkle 1 tablespoon of sugar on top of each chilled custard. Hold a kitchen torch 2 inches above surface to brown the sugar and form a crust. Garnish with cookies and fresh fruit. Serve at once.
Variation: Before dividing into ramekins: add 3 ounces of shaved dark chocolate for chocolate creme brulee; add 4 slices of crystallized ginger for ginger creme brulee; add 3 slices of orange peel for orange creme brulee. Let steep 20 minutes to infuse the flavor. Strain out the ginger and orange peel before baking.
Almost said “Forget About It”
February 27, 2009
Unfortunately, my blog has been affected by a delay in recent posts. The cause: writer’s block brought on by the silencing of my creative voice. The post attached to this recipe was about my time spent as a Supposed Mafia Princess. It only saw the light of day for 10 minutes before being stifled by maternal control. My anguish over this lost legendary anecdote (you thought I was going to go for the alliteration) had rendered me unable to post the recipe.
Today, that ended when the epiphany came; this recipe is one that needs to be shared and by doing so I can hack away at the beaver dam that is my writer’s block. There are ten or so recipes caught upstream. So please forgive me for not sharing the story of my faux Italian heritage and prepare for the flood that is about to come.
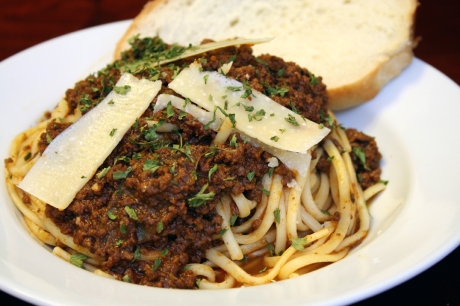
This recipe comes from the spiky haired brain of Anne Burrell. Some may not love her new show but the recipes are awesome. This is great for a lazy weekend day (because we all have so many of those). The effort you put in is definitely worth the result. I left the directions in her voice because I think it is very important to getting the correct results. Make sure you take the time to brown and develop the flavors in the veggies, meat, and tomato paste.
Alex rates this dish a 9 and I rate it a 9.5. The sauce is everything it should be. Creamy and favorful; it clings to the pasta like an pyscho ex-girlfriend.
Ingredients
- 1 large onion or 2 small, cut into 1-inch dice
- 2 large carrots, cut into 1/2-inch dice
- 3 ribs celery, cut into 1-inch dice
- 4 cloves garlic
- Extra-virgin olive oil, for the pan
- Kosher salt
- 3 pounds ground chuck, brisket or round or combination
- 2 cups tomato paste
- 3 cups hearty red wine
- Water
- 3 bay leaves
- 1 bunch thyme, tied in a bundle
- 1 pound spaghetti
- 1/2 cup grated Parmigiano-Reggiano
- High quality extra-virgin olive oil, for finishing
Directions
In a food processor, puree onion, carrots, celery, and garlic into a coarse paste. In a large pan over medium heat, coat pan with oil. Add the pureed veggies and season generously with salt. Bring the pan to a medium-high heat and cook until all the water has evaporated and they become nice and brown, stirring frequently, about 15 to 20 minutes. Be patient, this is where the big flavors develop.
Add the ground beef and season again generously with salt. BROWN THE BEEF! Brown food tastes good. Don’t rush this step. Cook another 15 to 20 minutes.
Add the tomato paste and cook until brown about 4 to 5 minutes. Add the red wine. Cook until the wine has reduced by half, another 4 to 5 minutes.
Add water to the pan until the water is about 1 inch above the meat. Toss in the bay leaves and the bundle of thyme and stir to combine everything. Bring to a boil and reduce to a simmer, stirring occasionally. As the water evaporates you will gradually need to add more, about 2 to 3 cups at a time. Don’t be shy about adding water during the cooking process, you can always cook it out. This is a game of reduce and add more water. This is where big rich flavors develop. If you try to add all the water in the beginning you will have boiled meat sauce rather than a rich, thick meaty sauce. Stir and TASTE frequently. Season with salt, if needed (you probably will). Simmer for 3 1/2 to 4 hours.
During the last 30 minutes of cooking, bring a large pot of water to a boil over high heat to cook the spaghetti. Pasta water should ALWAYS be well salted. Salty as the ocean! TASTE IT! If your pasta water is under seasoned it doesn’t matter how good your sauce is, your complete dish will always taste under seasoned. When the water is at a rolling boil add the spaghetti and cook for 1 minute less than it calls for on the package. Reserve 1/2 cup of the pasta cooking water.
While the pasta is cooking remove 1/2 of the ragu from the pot and reserve.
Drain the pasta and add to the pot with the remaining ragu. Stir or toss the pasta to coat with the sauce. Add some of the reserved sauce, if needed, to make it about an even ratio between pasta and sauce. Add the reserved pasta cooking water and cook the pasta and sauce together over a medium heat until the water has reduced. Turn off the heat and give a big sprinkle of Parmigiano and a generous drizzle of the high quality finishing olive oil. Toss or stir vigorously. Divide the pasta and sauce into serving bowls or 1 big pasta bowl. Top with remaining grated Parmigiano. Serve immediately.
We tend to disagree
February 10, 2009
Alex and I do not necessarily agree on everything. There are more than a few times that we are on opposite sides of the fence.
One of these times was one of our first dates. Looking back, it was quite romantically corny. Alex brought me to a park on campus. He parked next to a moonlight lake and turn the music up really loud. He suavely unbuckled my seat belt and took me out of the car to dance under the stars. Then, he decided that we should gaze up at those stars from the dock of the moonlit lake. The problem: the dock was over the river and through the woods. I voiced my fearful opposition based on the theory of woodland animals and serial killers awaiting our arrival. But, Alex, convinced of the increased romantic levels that were waiting for him on the dock, disagreed and we set out.
I am not brave. I do not pretend to be brave. If a serial killer attacked, I would throw you in front of him in hopes of making my escape successful. I clung to Alex during that five minute walk scanning my surrounding in search of impending doom. Each step was accompanied by a whimper. Every foreign sound warranted a plead to turn back. I was convinced that we were becoming the opening scene to some horrible B-rated horror flick. Alex disagreed.
We maneuvered our way down the dock. It creaked and swayed below our feet thus adding to my sense of security. We stood there for a moment and I began to relax. Then, right as we were getting ready to sit down and gaze up at the non-menacing stars, it happened. The forest shook and something or someone moved through the bushes. I reacted and pushed Alex out of my way and ran down the dock. Heart racing, I turned around frantically looking for my hunky protector. Alex was going to be no help to me though. He was knee deep in water pointing at a raccoon that had just wandered out of the woods. I explained my reasoning for sacrificing him while helping him out of the lake, all the way back to the car, and while I loaded his jeans into the washer. That we were in infinite peril and I reacted convinced he was stronger of the two with more of an opportunity to survive the supposed zombie attacker. Alex disagreed.
Honey Mustard or Barbecue Chicken Sandwiches 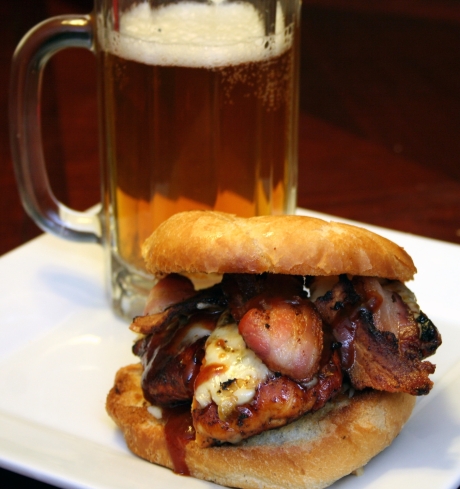
Just another thing Alex and I disagree about. If you would like to try the fabulous Honey Mustard goodness like I do, that recipe is first. The stupid barbecue one that Alex enjoys is second. We both rate these sandwiches an 8.5. There is nothing better than this and a good beer to finish off a long work day.
Today’s Recipe is adapted from the brilliant mind of the Pioneer Woman
Honey Mustard Marinade
½ cup of Dijon Mustard
½ cup of Honey
Juice of ½ lemon
½ teaspoon Paprika
½ teaspoon Salt
1. Combine all ingredients in a bowl.
2. Whisk until smooth.
Barbecue Marinade
½ cup of your favorite BBQ sauce
½ cup Honey
Juice of ½ lemon
½ teaspoon Paprika
½ teaspoon Salt
Sprinkle of Cayenne and Red Pepper Chili Flake
1. Combine all ingredients in a bowl.
2. Whisk until smooth.
Chicken Sandwich
2 Big Boneless Skinless Chicken Breast
3 Strips of Bacon
Your favorite kind of Cheese (I use Sharp Cheddar for Honey Mustard and Pepper Jack for BBQ)
2 Hearty Can Hold Onto a Filling Rolls
Canola Oil
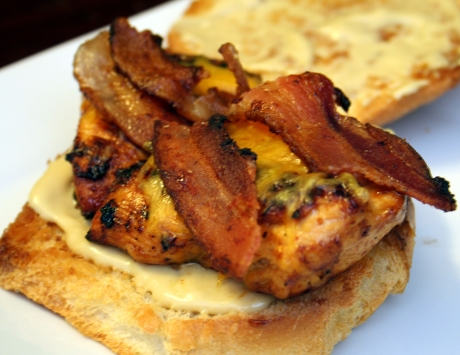
1. Rinse the chicken breast and pat them dry.
2. Butterfly the chicken breast and cut down the seam. This will give you two halves of equal width.
3. Place the chicken breast in marinades, cover with plastic wrap and place in the fridge for 1 to 3 hours.
4. When ready to make the sandwiches, fry up some bacon. When finished cooking, reserve ¼ cup of the bacon grease and clean out the skillet.
5. Preheat the oven to 400.
6. Return about a tablespoon of the bacon grease to the skillet along with 1 tablespoon of Canola Oil. Place the pan over medium-high heat.
7. Remove the chicken from the fridge and drain off the extra marinade.
8. Place the chicken in the pan and cook 1 to 1 ½ minute per side until the chicken starts to brown.
9. Remove the chicken from the pan and place on a cooking sheet.
10. Place the cookie sheet in the oven and cook chicken about 10 minutes. Remove from oven.
11. While the chicken is cooking, prepare your roll. You can toast or untoast and add lettuce, mayo, tomato, onion etc. I like to eat the Honey Mustard with a little honey mustard sauce.
12. Place a few pieces of bacon on top of the chicken and sprinkle generously with cheese.
13. Return the pan to the oven and cook for additional 5 minutes or until the cheese is melted and bubbly. Place the chicken on the prepare roll and enjoy!
Honey Mustard Sauce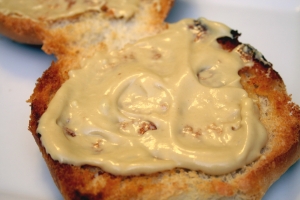
¼ cup Mayo
1 ½ tbsp Dijon Mustard
1 ½ tbsp Honey
Splash of White Vinegar
1. Combine all ingredients ( taste is very subjective you can add more mustard or honey as needed) and whisk.

